# 병렬 Task 의존성 작성하기
# 사전 준비
Task를 병렬적(Parallel)으로 실행하기 위해서는 다음을 먼저 준비해야 합니다.
- Meta Database를 SQLite(default)가 아닌 Meta Database(MySQL, Postgres 등)로 바꿔주기
- Executor를 Sequential Executor(default)가 Executor(Local Executor 등)으로 바꿔주기
별도의 작업을 하지 않으면 Airflow는 기본적으로 Database는 SQLite를 사용하고 Executor는 Sequential Executor를 사용합니다. 그러나 이 값들은 실제 운영(Production) 환경에 올리기 적합하지 않으며, 공식 문서에도 실제 운영 환경에 Airflow를 배포할 때는 이 기본 값들을 바꿔서 쓰라고 말하고 있습니다.
여기서는 Meta Database를 Postgres로, Executor는 Local Executor로 바꾸어보겠습니다.
# 도커로 Postgres 배포하기
Postgres를 가장 간단하게 배포하는 중 하나는 도커를 이용하여 배포하는 것입니다.
TIP
도커에 대해 처음 들어보시는 분들은 subicura 님의 초보를 위한 도커 안내서 (opens new window)를 읽어보시길 추천드립니다.
새로운 셸을 열어 다음 명령어로 Postgres 컨테이너를 실행합니다.
$ docker run --name postgres -e POSTGRES_USER=airflow -e POSTGRES_PASSWORD=1234 -p 5432:5432 postgres:13
컨테이너가 제대로 동작하는지 또다른 셸에서 다음처럼 확인할 수 있습니다.
$ docker ps

CONTAINER ID   IMAGE         COMMAND                  CREATED         STATUS              PORTS                    NAMES
c0b60f349279   postgres:13   "docker-entrypoint.s…"   3 minutes ago   Up About a minute   0.0.0.0:5432->5432/tcp   postgre
2
3
4
# Airflow에 Postgres 연결하기
가상환경에 진입 후, Postgres와 연결할 수 있는 드라이버 관련 파이썬 패키지를 다음처럼 설치합니다.
$ pip install psycopg2
설치가 완료되면 $AIRFLOW_HOME 경로에서 airflow.cfg 파일을 찾습니다.
airflow.cfg 파일 내에서 sql_alchemy_conn 를 검색해보면 이 값이 다음처럼 설정이 되어있습니다.
sql_alchemy_conn = sqlite:///./airflow.db
이 값을 다음처럼 postgres를 사용하도록 변경합니다.
sql_alchemy_conn = postgresql+psycopg2://airflow:1234@localhost:5432/airflow
TIP
sql_alchemy_conn 의 포맷은 SQLAlchemy에서 Engine 인스턴스를 만들 때 사용하는 URL 포맷입니다.
이에 대한 내용은 SQLAlchemy 공식 문서 (opens new window)에서 확인하실 수 있습니다.
참고로 SQLAlchemy (opens new window)는 파이썬 애플리케이션에서 Database와 연결하기 위해 사용하는 가장 대표적인 라이브러리이며, 수많은 파이썬 오픈소스에서 사용되고 있습니다.
설정을 완료했다면, Airflow에서 Database를 다시 초기화 해야 합니다. 다음 명령어로 초기화합니다.
$ airflow db init
이제 Airflow 관련 Meta Database로 SQLite가 아닌 새로 배포한 Postgres를 연결하도록 설정 세팅을 완료했습니다.
# Local Executor 사용하기
$AIRFLOW_HOME 경로의 airflow.cfg 파일 내에서 executor 를 찾습니다. 이 값은 다음처럼 되어있을 것입니다.
executor = SequentialExecutor
이 값을 다음처럼 바꿔줍니다.
executor = LocalExecutor
이제 Scheduler가 사용할 Executor로 SequentialExecutor Executor가 아닌 LocalExecutor를 사용하도록 설정 세팅을 완료했습니다.
# Airflow Scheduler 재기동하기
바꿔준 이후 Airflow Scheduler를 다시 실행합니다. (만약 켜져있는 상태면 먼저 종료시킵니다.)
$ airflow scheduler
# Graph View
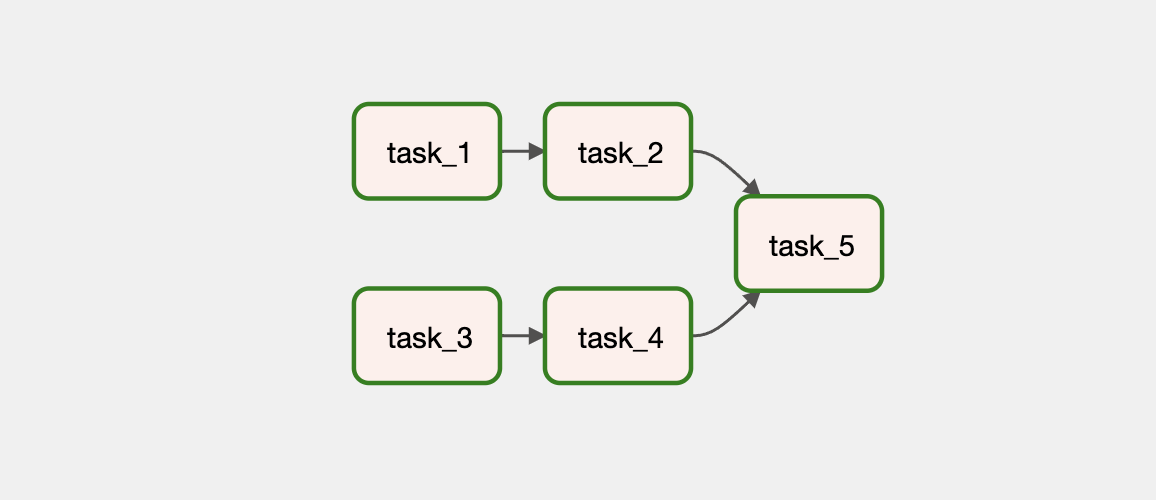
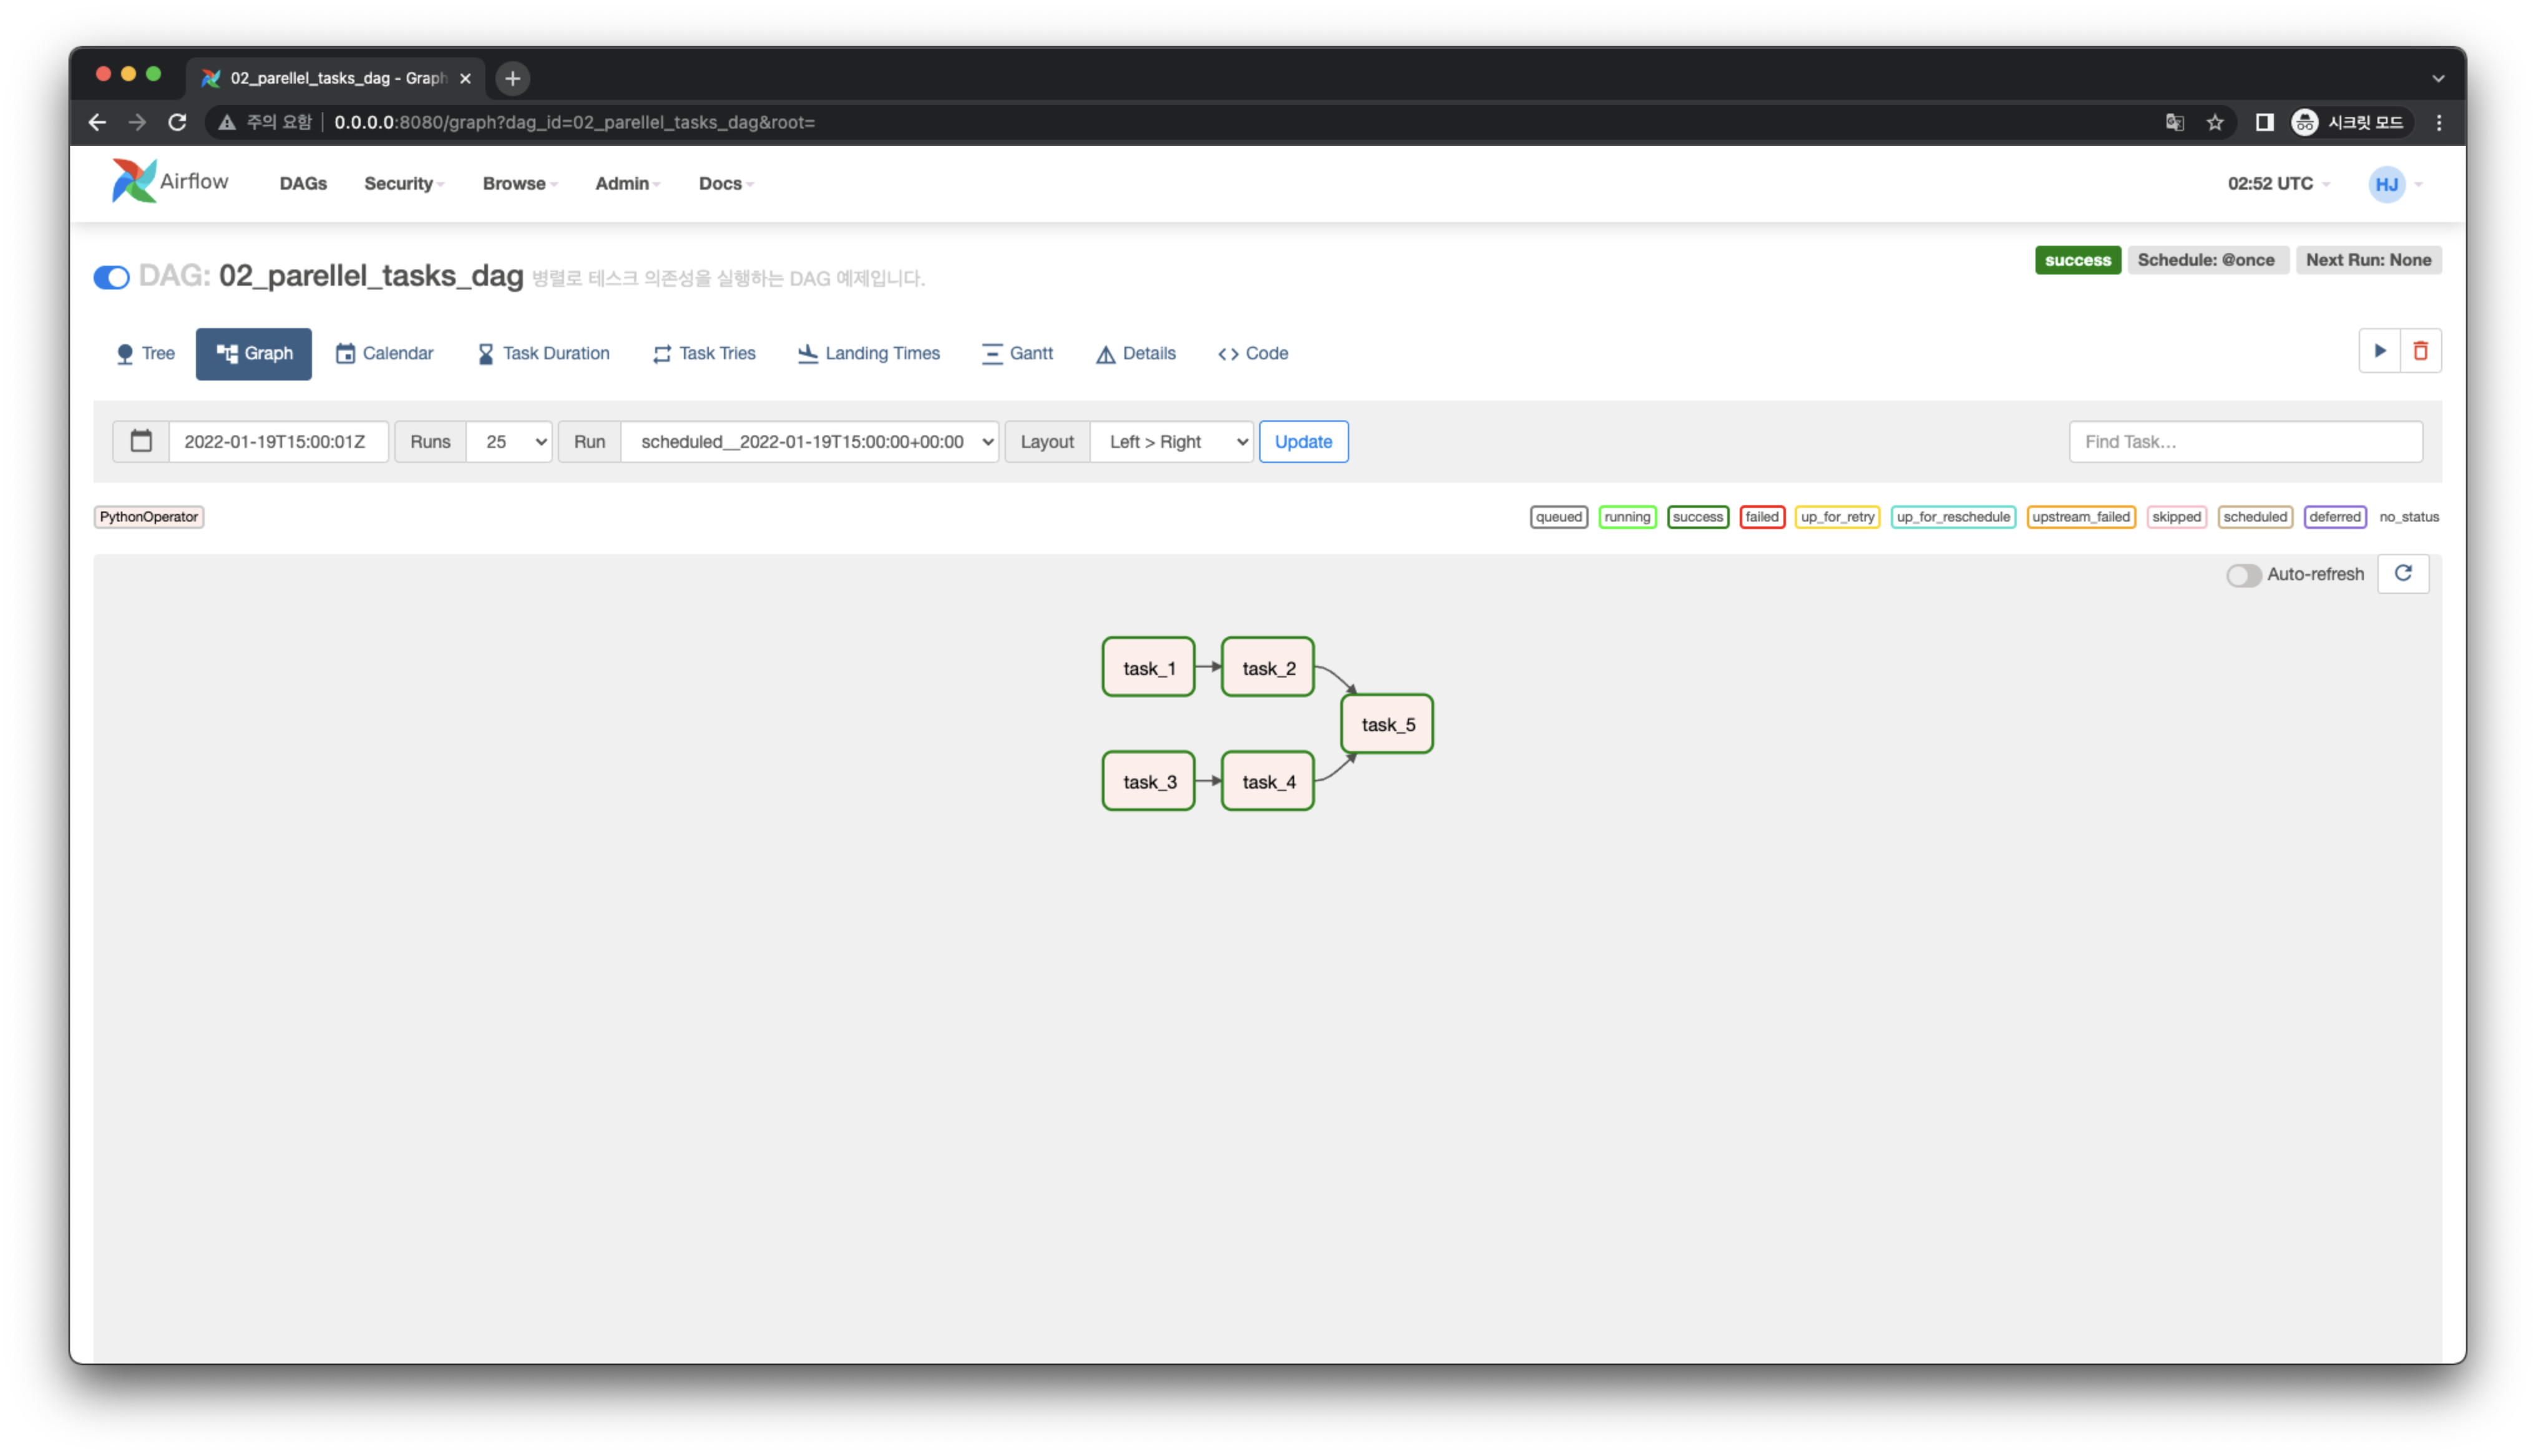
다음과 같이 병렬로 Task 의존성을 가지는 DAG을 작성해봅시다.

# Code
from datetime import datetime, timedelta
from time import sleep

from airflow import DAG
from airflow.operators.python import PythonOperator
from pendulum.tz.timezone import Timezone

with DAG(
    dag_id="02_parallel_tasks",
    description="병렬적인 Task 의존성을 가지는 DAG 예제입니다.",
    default_args={
        "owner": "heumsi",
        "retries": 1,
        "retry_delay": timedelta(minutes=1),
    },
    start_date=datetime(2022, 1, 20, tzinfo=Timezone("Asia/Seoul")),
    schedule_interval="@once",
    tags=["examples", "01_writing_various_task_flows"],
) as dag:

    def dump() -> None:
        sleep(3)

    task_1 = PythonOperator(task_id="task_1", python_callable=dump)
    task_2 = PythonOperator(task_id="task_2", python_callable=dump)
    task_3 = PythonOperator(task_id="task_3", python_callable=dump)
    task_4 = PythonOperator(task_id="task_4", python_callable=dump)
    task_5 = PythonOperator(task_id="task_5", python_callable=dump)

    task_1 >> task_2 >> task_5
    task_3 >> task_4 >> task_5
2
3
4
5
6
7
8
9
10
11
12
13
14
15
16
17
18
19
20
21
22
23
24
25
26
27
28
29
30
31
- Task 간 의존성은
with(...)구문 내 어디에 작성되어도 괜찮습니다. - Scheduler는 DAG 파일을 파싱할 때 Task 간 의존성을 정의하는 라인을 모두 파싱하여 DAG을 그립니다.
# Web UI

